Adobe Lightroom Classic is full of shortcuts and learning them all can be slightly overwhelming.

Here is one shortcut that is useful, well two maybe.

Exporting photos from Lightroom is one of the most repeated tasks and speeding up that process can make a project quicker.


There are a few ways to get to the export dialog in Lightroom:

  1. File > Export...

  2. Right click on the image then Export > Export...

  3. Use a shortcut: Ctrl-Shift-E


All of these will bring up the Export dialog where choices can be made about export size, file type, watermark etc. but option 3 is by far the quickest, three buttons close together.

Then to further speed up your exports this shortcut will help.

Ctrl+Alt+Shift+E [Export with Previous] will export further images with the same settings as the last one you set.

All you Mac users will of course know by now to use Command instead of Ctrl.

And of course it is possible to export multiple images in the same way, just select more than one then use the shortcut Ctrl-Shift-E to bring you to the export dialog or Ctrl-Alt-Shift-E to export the images with previous settings.
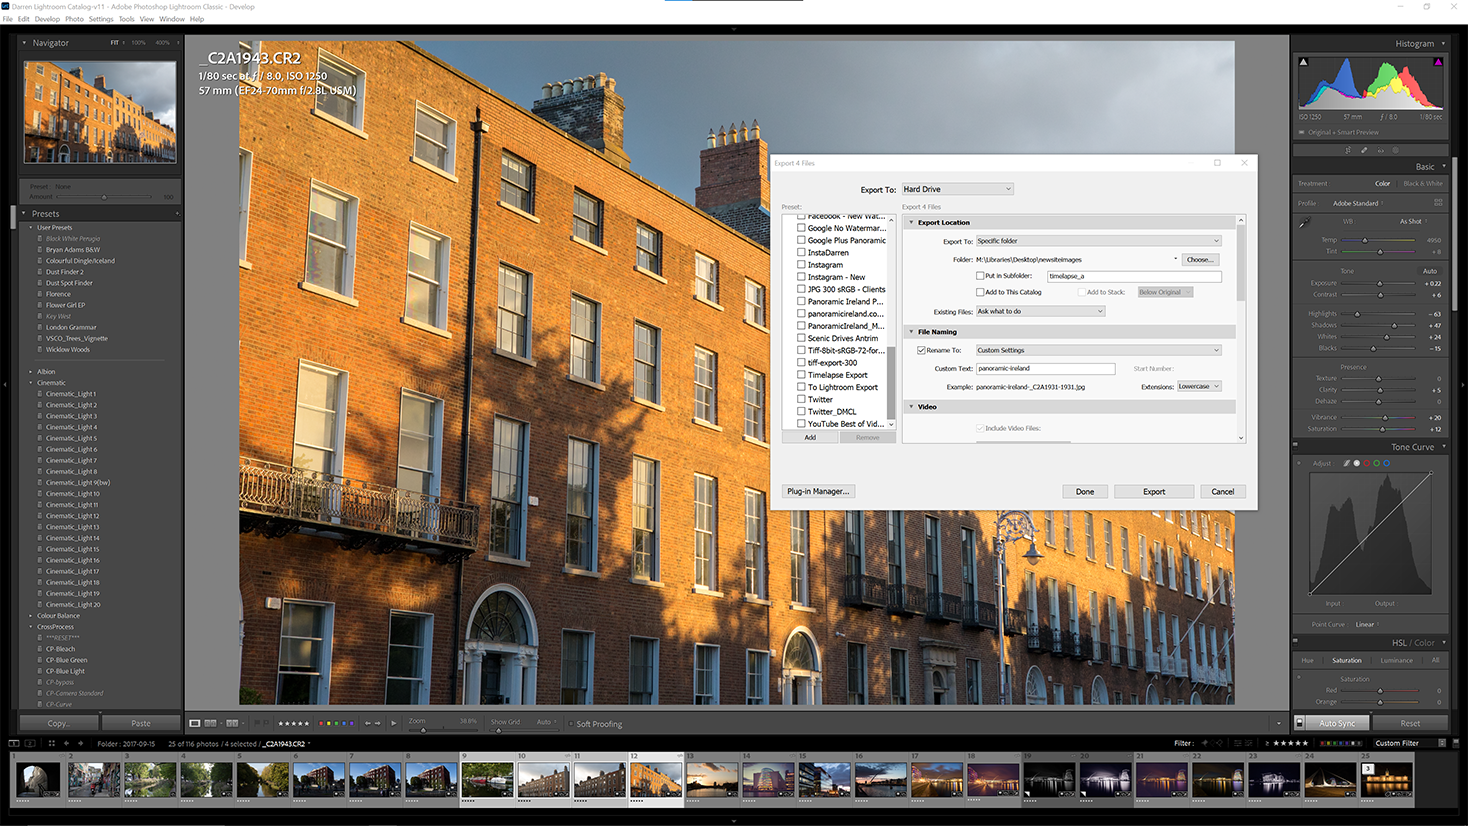
Using Ctrl-Shift-E in Adobe Lightroom Classic to export multiple images

{}


After photographing a rock concert last night in Dublin, I added my images to Lightroom Classic and wanted to process a number of files in DxO PureRaw.

To do this of course, I had to select and make note of the images - yes, I know that DxO have just released PureRAW2 that allows you to do this inside of Lightroom.

For some this can be difficult to do with many images to process.

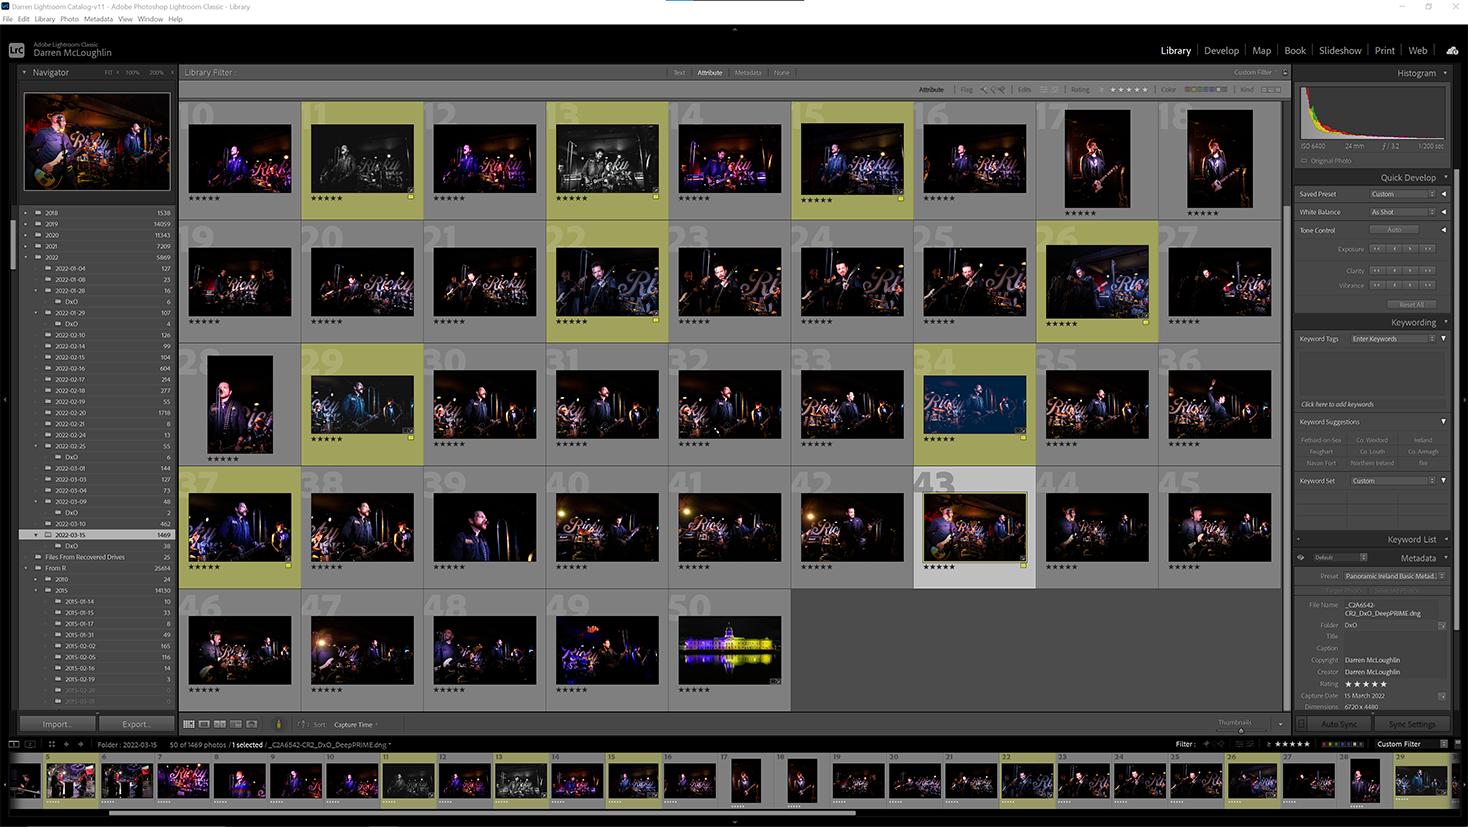
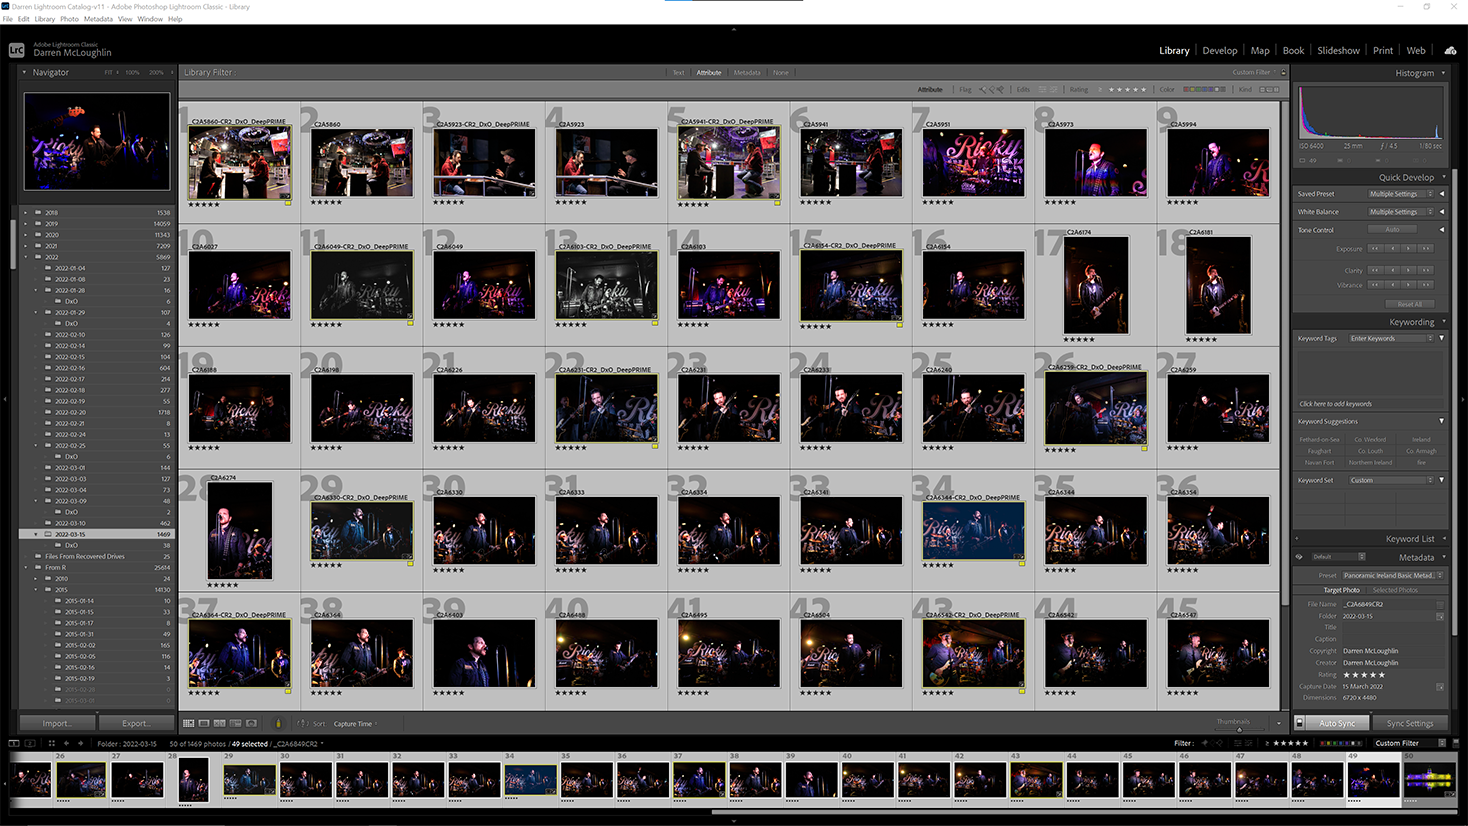
In Adobe Lightroom Classic's Library grid view it can be difficult to find or see filenames depending on your settings.

Adobe Lightroom Grid View No Filenames

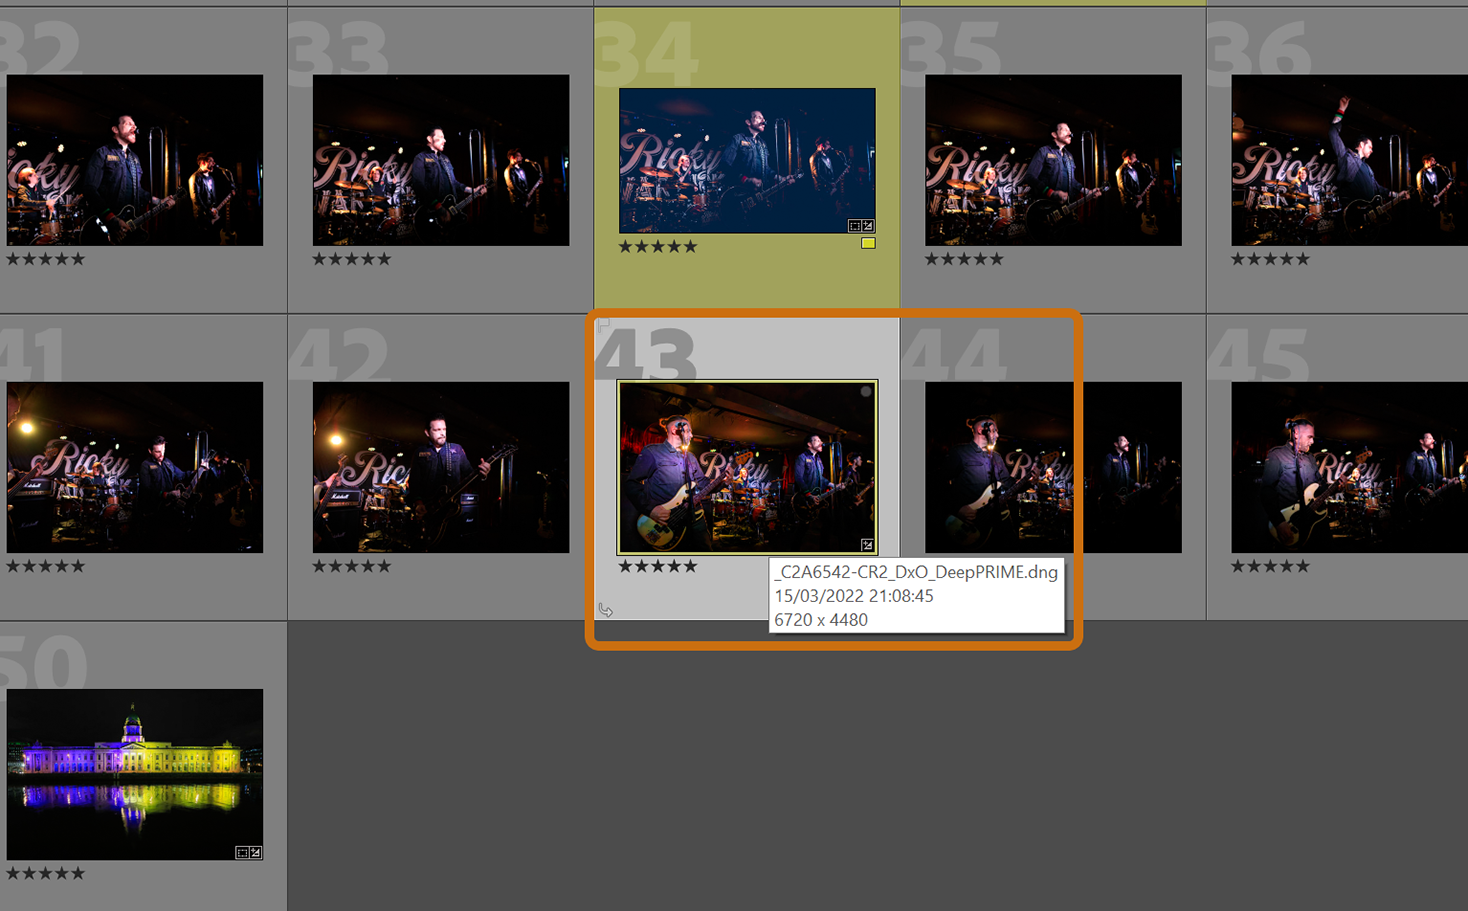
Hovering your mouse over an image will bring up some of its metadata such as filename, capture date and image dimensions.

{}

Adobe Lightroom Grid View Hover for Details

So, here are the steps to fix this inconvenience.

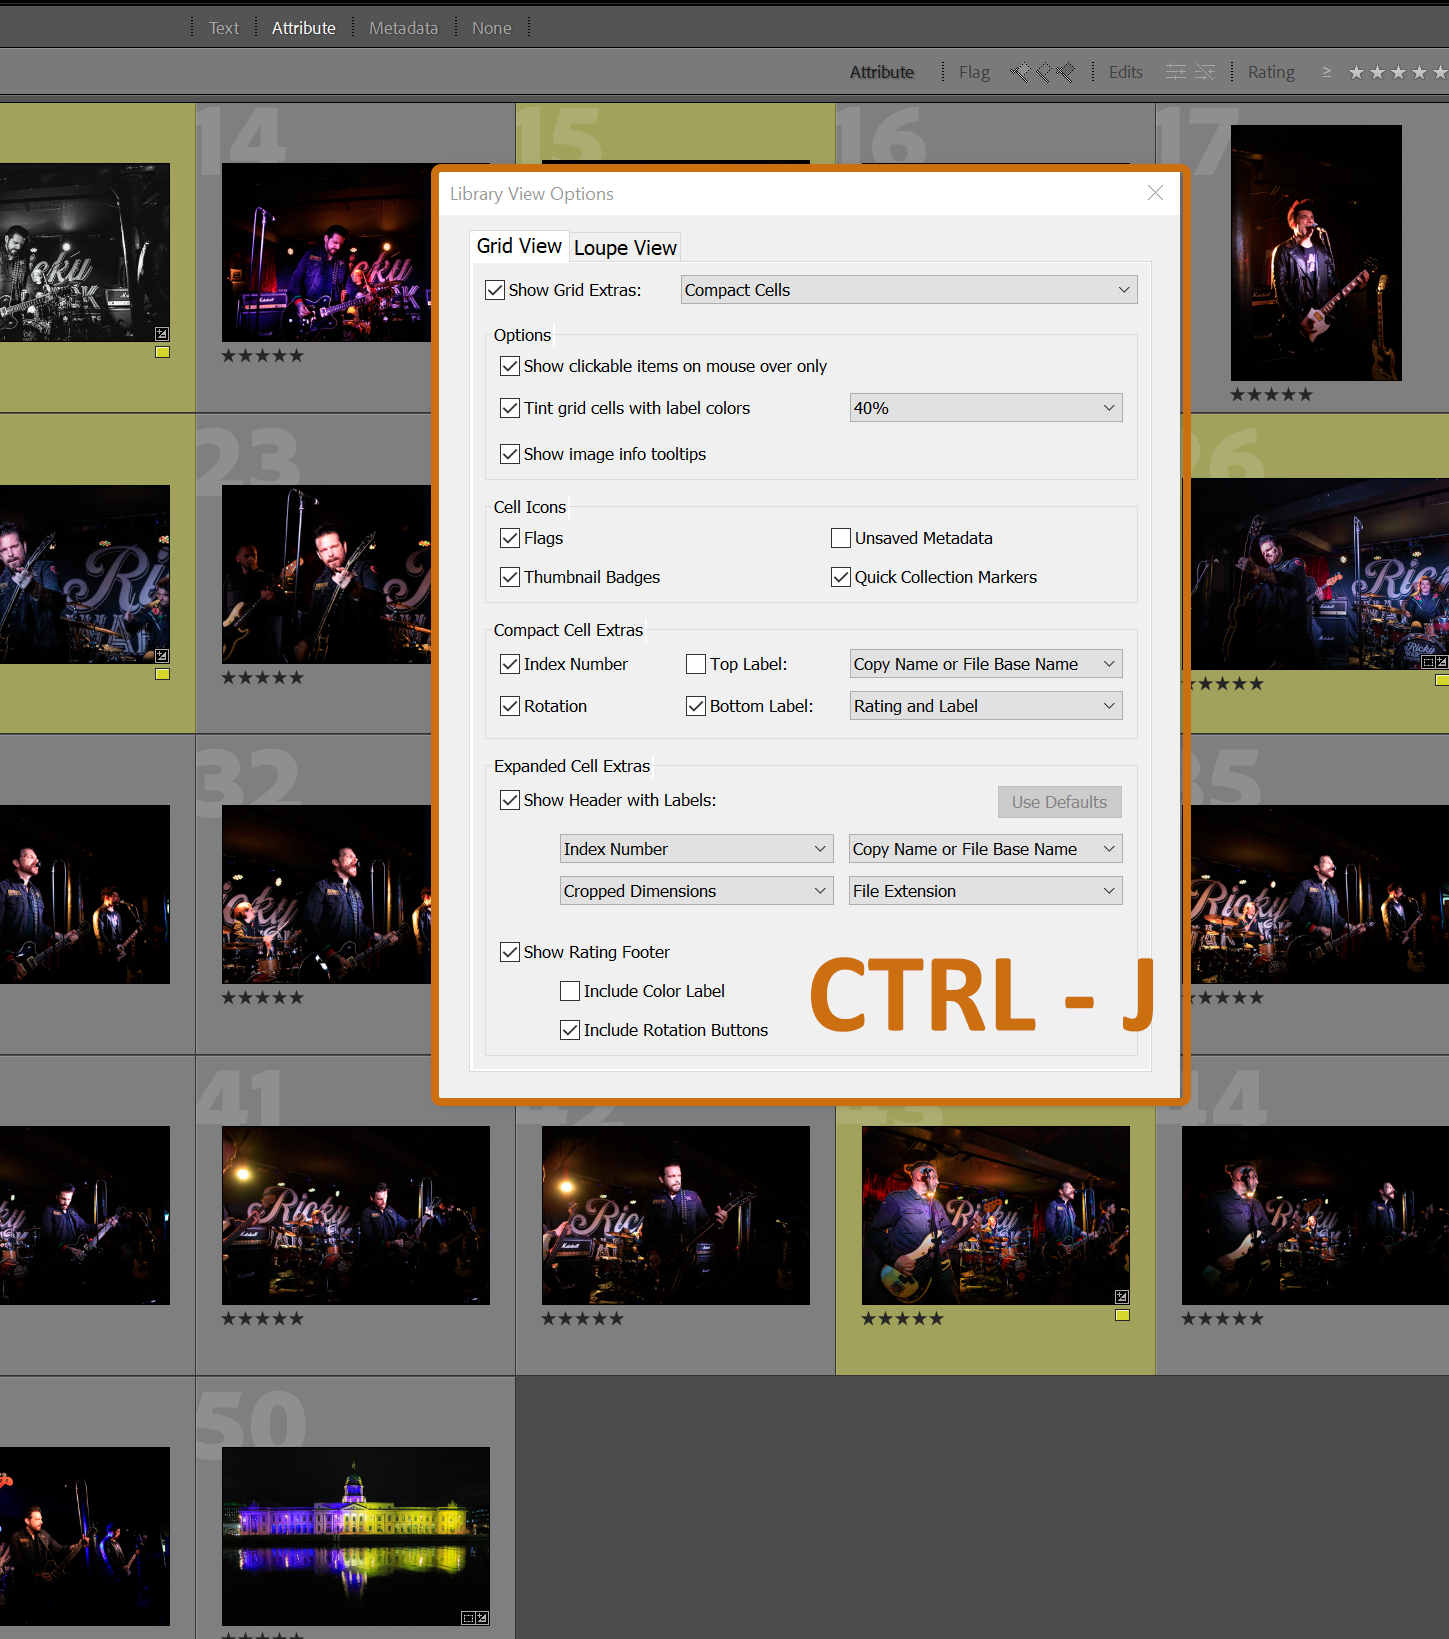
When in Grid View (G) press CTRL and J together to bring up the Library View Options panel.

Adobe Lightroom Grid View CTRL-J

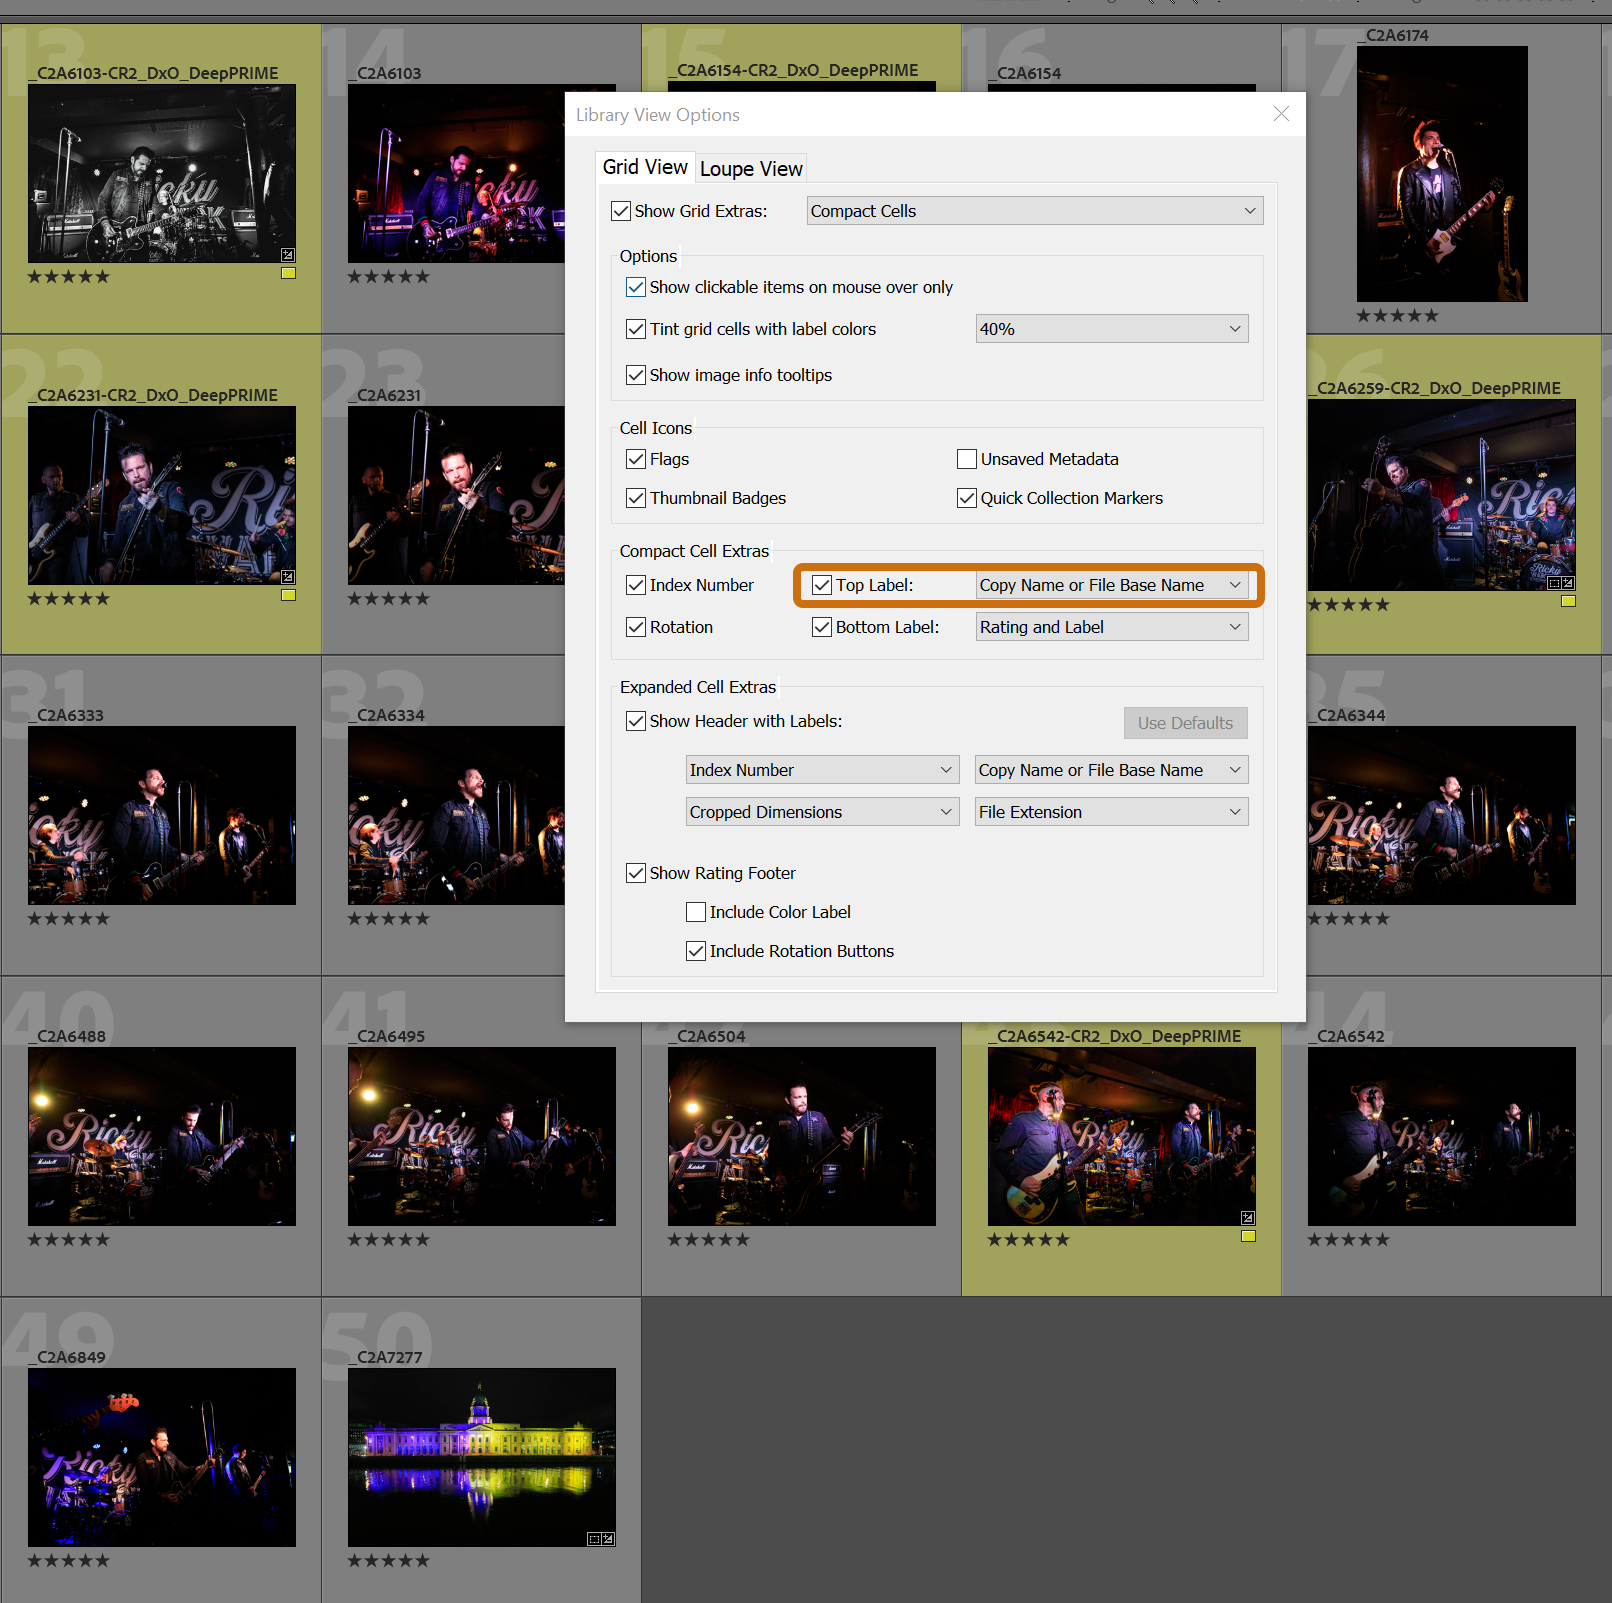
Click to enable Top Label and make sure the box is set to Copy Name or File Base Name.

Adobe Lightroom Grid View Top Label

That's it, in Grid View the image's file name will now be displayed above the image making it easy to copy multiple filenames without having to hover over it.

Adobe Lightroom Grid View Filenames

To find out more about how Panoramic Ireland's online, or in-person photography tuition can benefit you, send us an email.

{}


We all get to the stage where images are stored on different drives and sometimes we won't have access to those drives.

Especially when working on a laptop, a desk drive might be in a different location and the images on it temporarily inaccessible.

Lightroom has a handy feature for this very situation, called Smart Previews.

Smart Previews allow you to edit images when Lightroom can't access the original file, it contains all of your edits to the file made when the image was accessible.

{}

When you have imported images into Lightroom Classic, you can create Smart Previews individually in the Develop Module (CTRL-ALT-2) or individually and in multiples in the Library Module (CTRL-ALT-1).

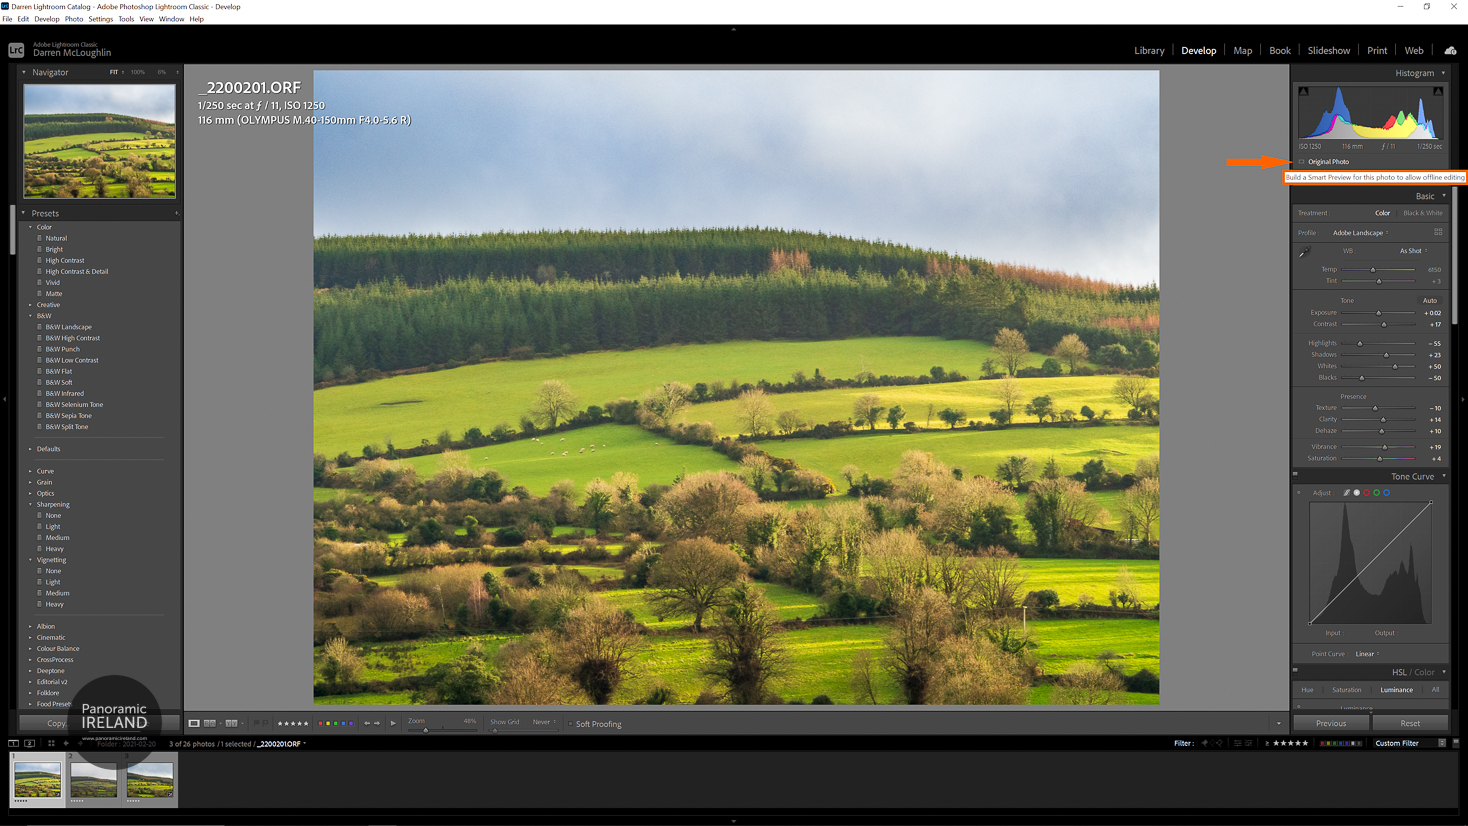
To create a Smart Preview for one image from the Develop Module, see the image below.

Adobe Lightroom Develop Module Create Smart Preview


In the panel on the right hand side, just under the histogram, click on Original Photo and you will see highlighted Build a Smart Preview for this photo to allow offline editing.

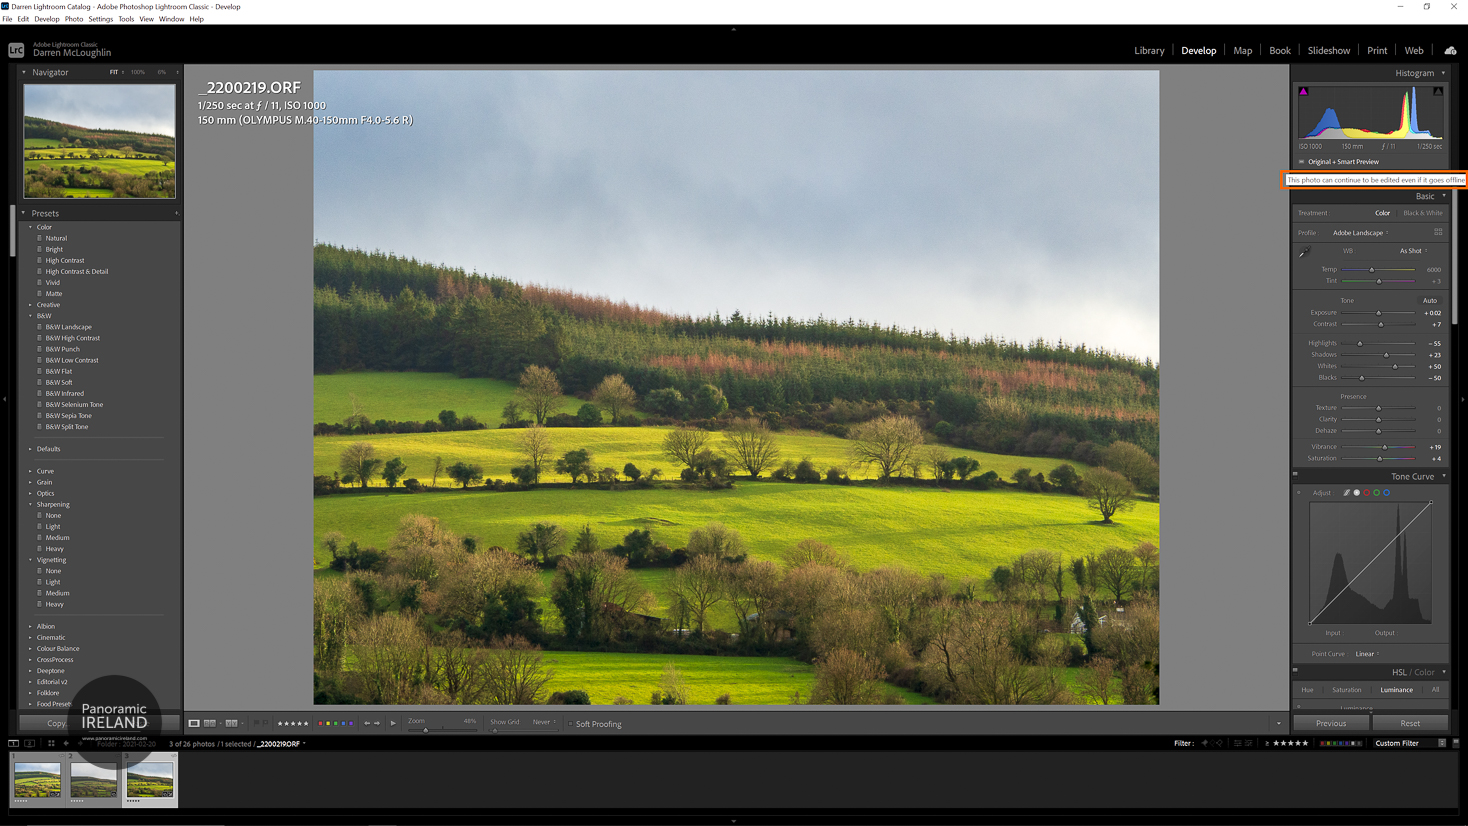
That's it, once you have clicked on this and you will now see Original + Smart Preview.

Adobe Lightroom Develop Module Confirm Smart Preview


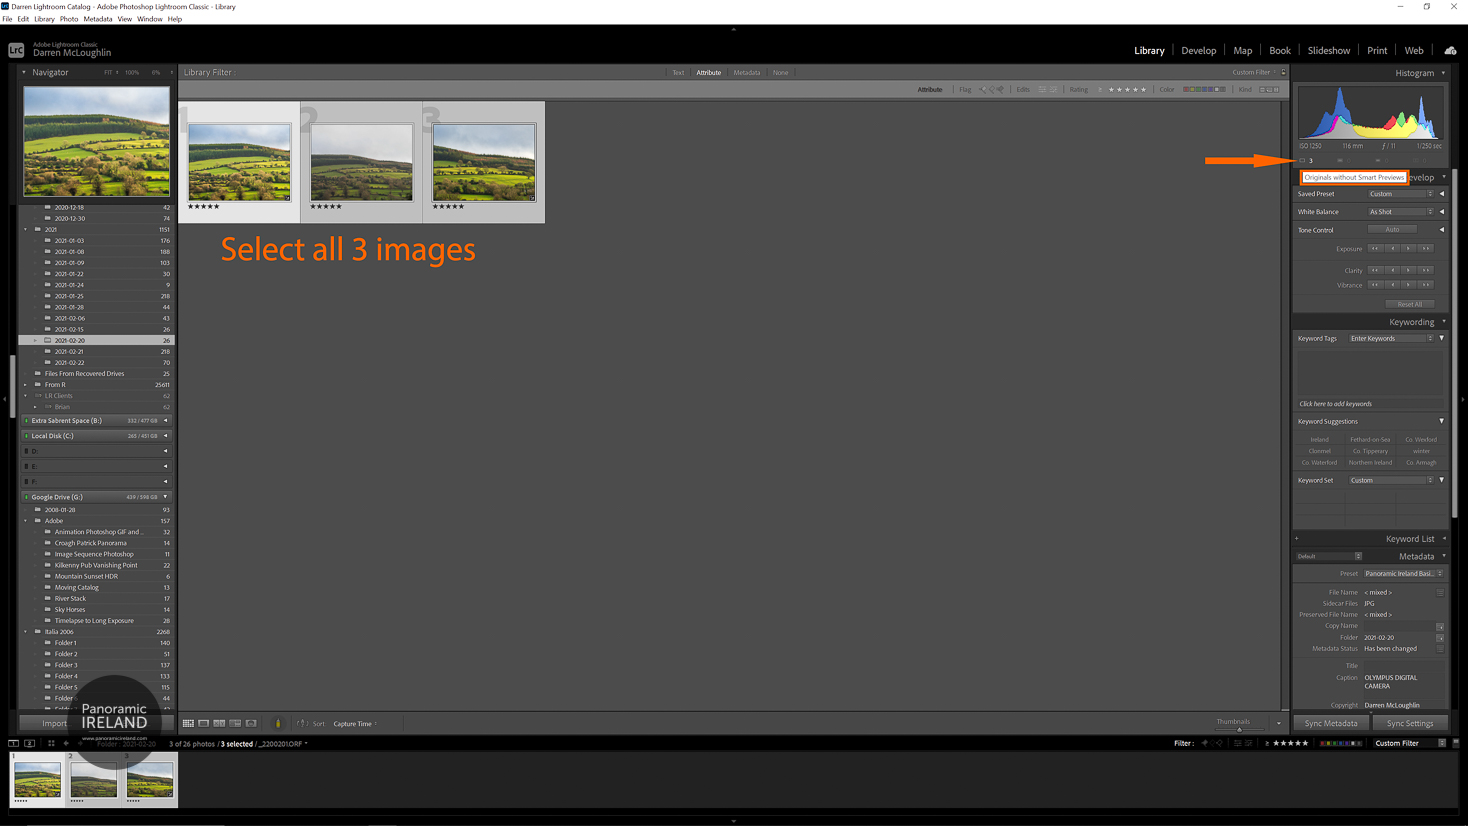
To create Smart Previews from the Library Module, the process is similar.

Here, in the image below I have chosen three images in the Library.

Clicking on the rectangle with 3 beside it will make Lightroom build those 3 Smart Previews in one go.

Adobe Lightroom Library Module Create Smart Previews for Multiple Images


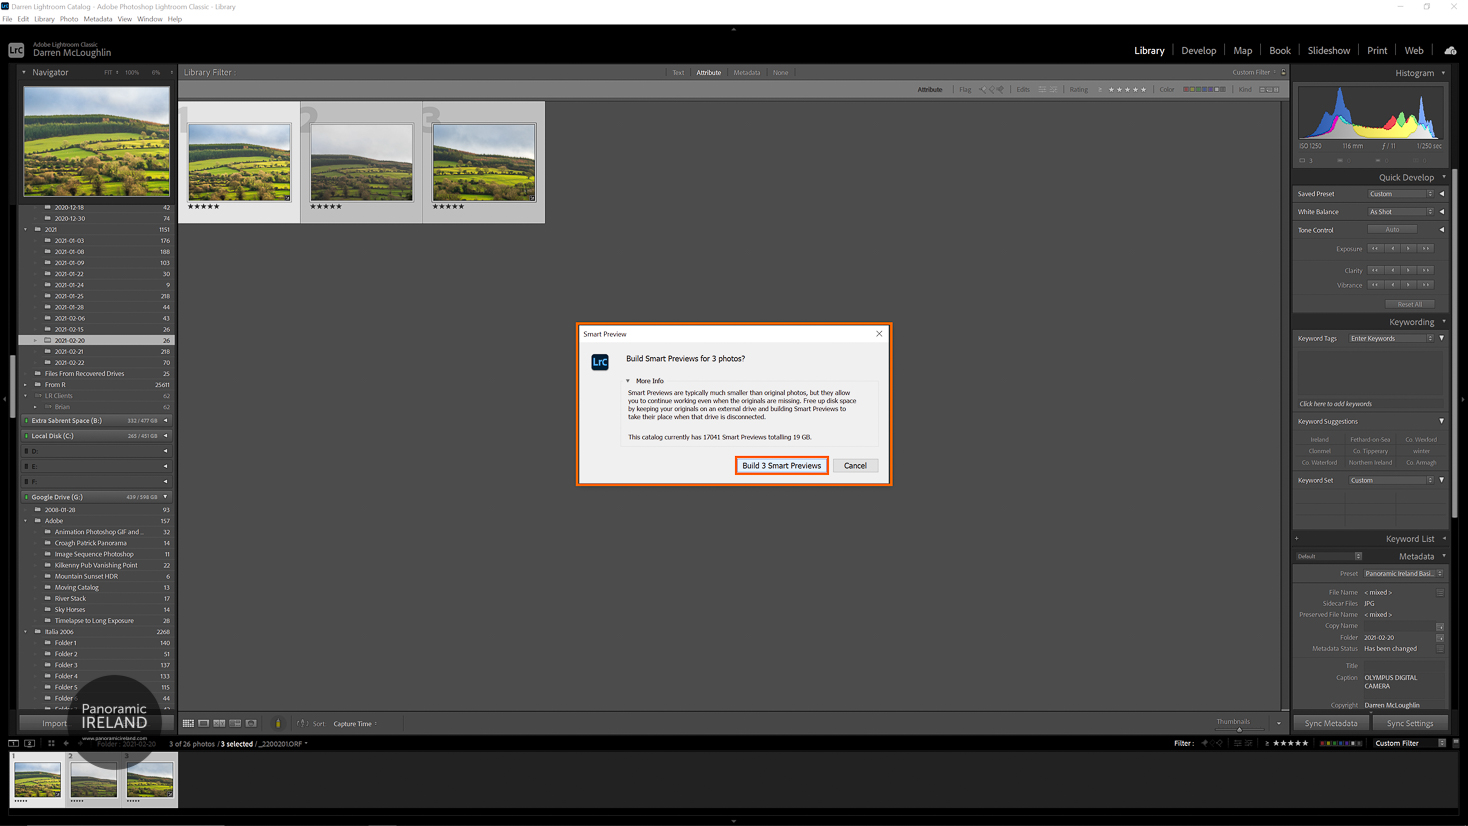
A dialog opens to ask if you want to Build 3 Smart Previews or Cancel, clicking on Build will create the Smart Previews - if you have more than a few it could take some time but the process will run in the background.

{}

Adobe Lightroom Library Module Create Smart Previews Confirm for Multiple Images

Smart Previews allow you to access images that are not available for whatever reason, they do take up space on your hard drive but not as much as the original image.

A typical Smart Preview will take up 1-2MB of space and are stored in the "...Lightroom Catalog Smart Previews.lrdata" folder in the same location as your Lightroom Classic Catalog.